Using the BBTK 1-4 button USB response pad with slider/fader: Worked example
 Often
researchers need to measure more than simple button presses in
Judgement and Decision Making studies. Currently there are no easy
to use response pads for measuring finite judgements across Likert
Scales.
Often
researchers need to measure more than simple button presses in
Judgement and Decision Making studies. Currently there are no easy
to use response pads for measuring finite judgements across Likert
Scales.Our new USB response pad with slider, or fader like those used in music recording studios, allows for up to 1024 positions over a 15 cm track. Slider position is reported as either a series of standard keystrokes or as a number between 0 and 1023 followed by return. For EEG studies TTL Event Marking lines allow for the position of the slider to be reported alongside button status.
By moving the slider left or right the participant has the opportunity to make finer decisions.
In addition to the slider up to four buttons can be located anywhere on the lid. A selection of colors and formats are available along with
clear caps under which labels can be inserted.
There are also sockets for up to 4 external buttons
Worked example
Shown below is a simple worked example illustrating how to use the 1-4 button USB response pad with slider/fader. It is intended to give you a flavor of how the URP Slider could work for you and how easy it is to use.Step 1: Running your experiment, presenting stimuli and collecting responses
This example will be using our URP Slider partner App in place of an actual experiment to more clearly illustrate the concepts involved and how the slider position and button presses are reported as keystrokes to your experiment.Once you are familiar with the concepts it should be relatively simple to integrate it withing your own study. In this example we are going to look at rating how happy you are on a Likert Scale and then moving on to the next question using the top right button.
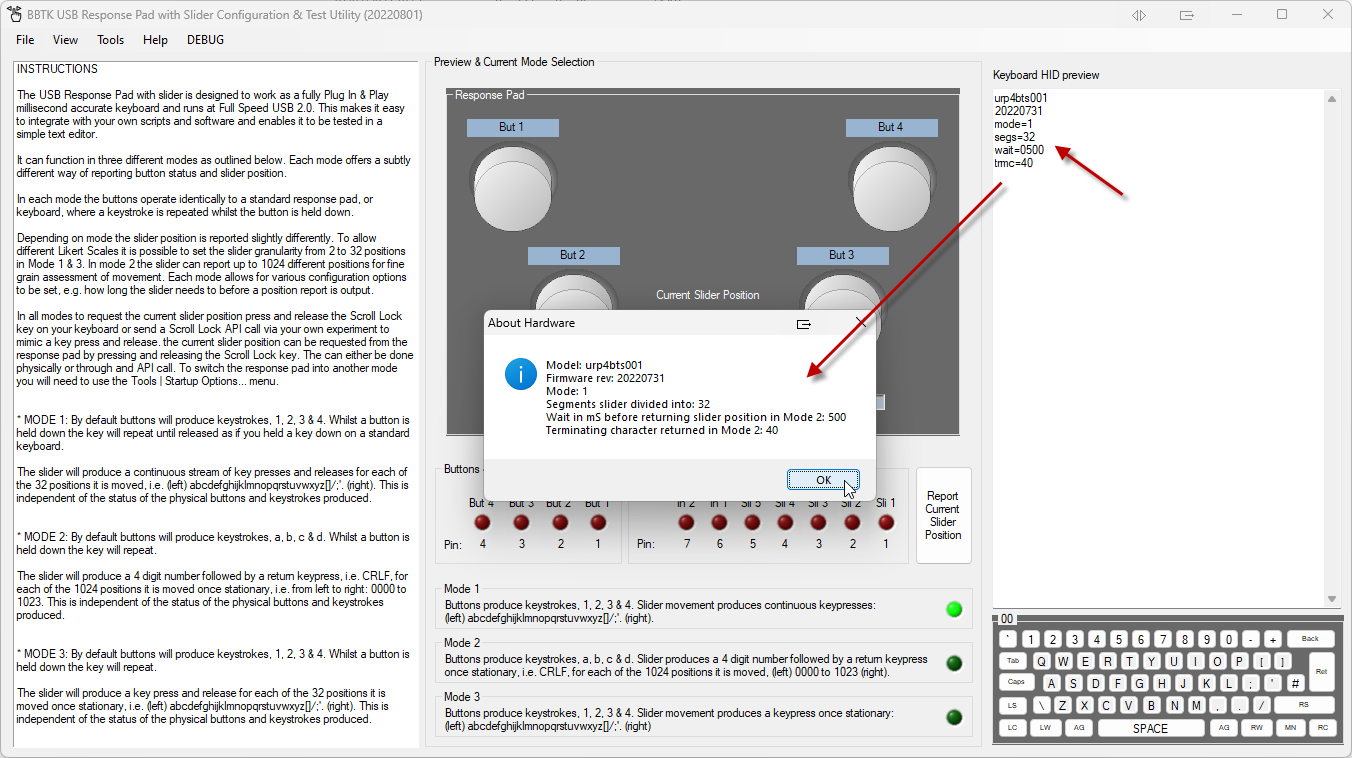
When first plugging in the response pad you can request it's current settings by pressing the NUMLOCK key on your keyboard. The settings will be typed back to your PC as though they had been typed into a text editor on a keyboard. If you had a text editor open when you pressed NUMLOCK you would see them typed as shown on the right below in the Keyboard HID preview window.
Step 2: Working out where the slider is positioned before you start your experiment
Before your experiment starts you should move the slider around before moving back to a known position. Generally the slider is moved back to the far left, or position 0 (zero) as shown below. If move to position 0 and no buttons are pressed all TTLs will also be 0 V. This can be done in our App as shown below or at the start of your experiment and only needs to be done once.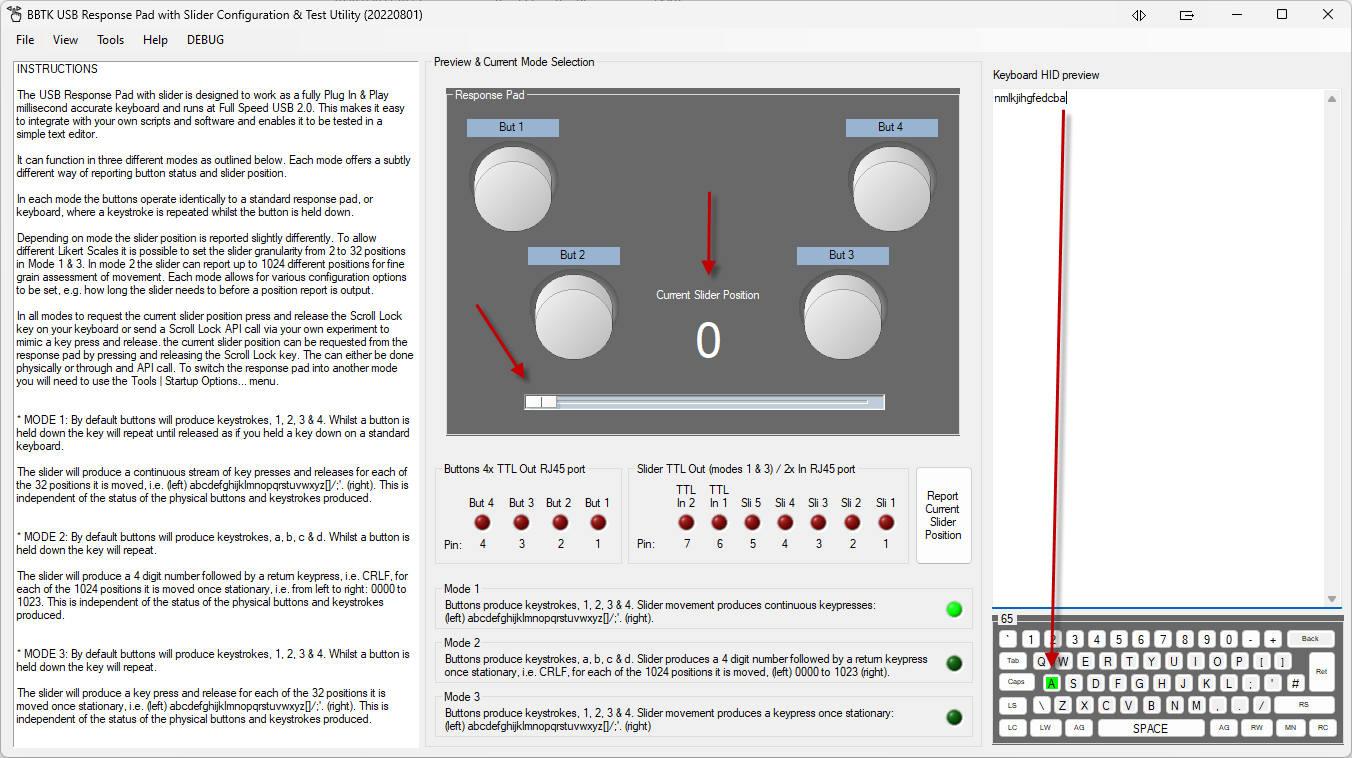
Step 3: Presenting a question and making a rating on a Likert Scale
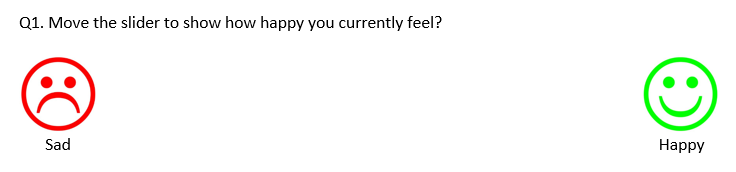
Remember that the URP Slider works just like a keyboard so in your experiment you only need to monitor for the last key pressed when the slider is moved. Generally one of the buttons is used to accept the response/rating and move on to the next question.For example, you might present a mood based question like the one shown below:
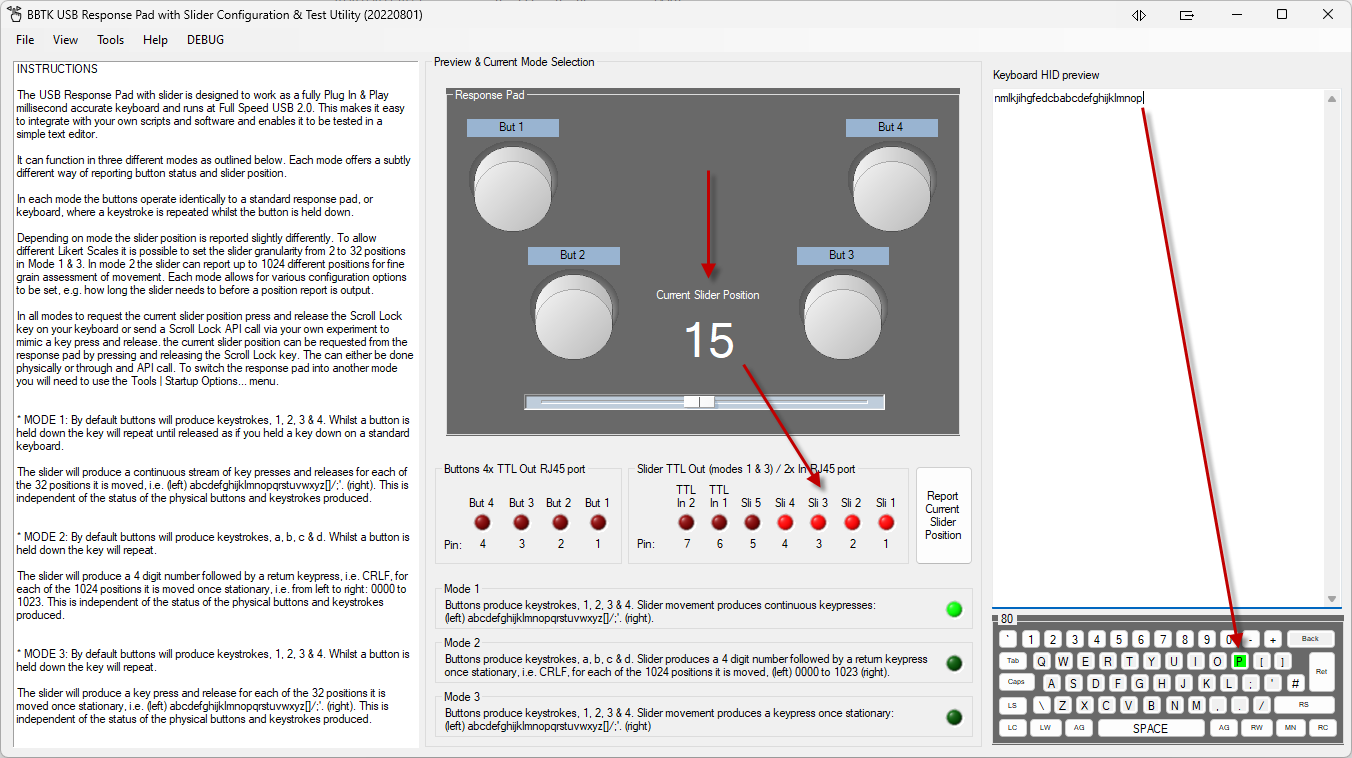
Your participant might move the slider to somewhere in the middle as shown in the URP Slider App below. Here we can see that the slider has been moved to position 15, which is around the mid point. The last character to be typed would be the letter "p" once the slider had stopped moving.
You can also see that 4 TTL lines from the 5 bit port are lit representing the slider position as a binary value 01111 or 15. If you were using an EEG it would be possible to feed these into the the Digital Trigger In port so that you stored a value and marker for the response.
Decoding slider position values is easy as all you need to do is convert the TTL binary encoding to decimal using the table below.
In this case the slider position is 1 + 2 + 4 + 8 = 15.

Step 4: Accepting a rating
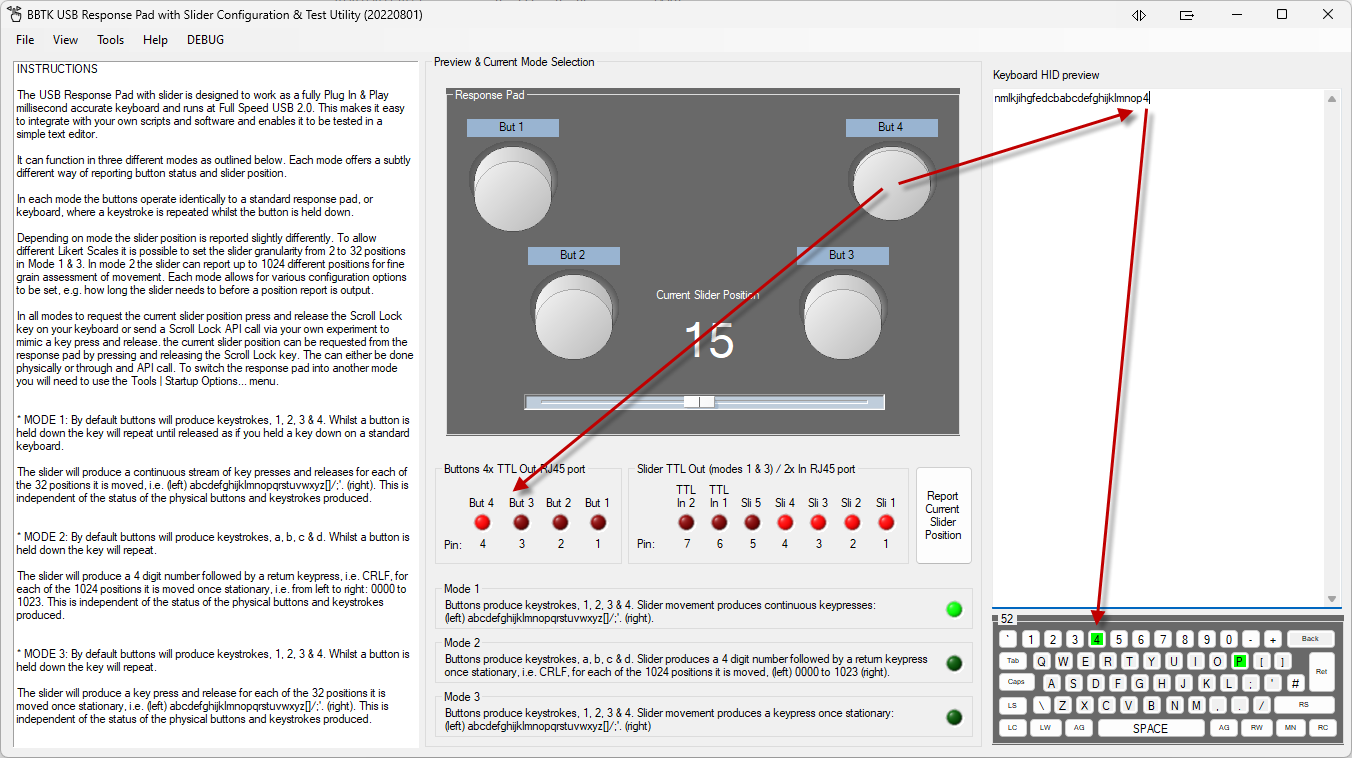
To accept a rating you could wait for a button press in your experiment. In this case button 4 is used to accept the rating and move on to the next question. In the URP Slider App below we can see when the button is pressed as a number 4 is typed.In your experiment you would store the last character, a "p" or position 15, once you saw a number 4 being typed.
Pin 4 on the button TTL port would go to +5 V to indicate the button was being pressed. It would also be possible to take this button press as a response in order to record a response time in your experiment.

Step 5: Moving on to the next question and storing slider position
When moving on to the next question you would already know where the slider was positioned if no movement was made, i.e. still at "p" or position 15. So if button 4 was pressed in response to the question below and there was no letter change, you would know that the slider was still at position 15. If any other letters were received then you would know that the slider had moved.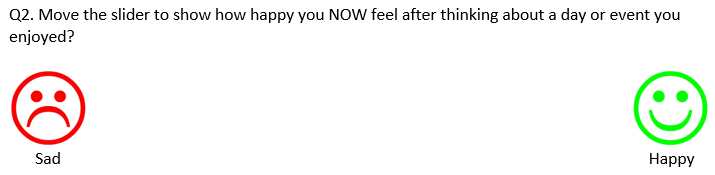
Going further with the URP slider
Depending on the mode you are running the URP Slider in you could have between 2 to 1024 slider positions rather than the default 2-32. This could allow for very fine grain judgements.You could easily provide visual feedback of slider position in your experiment as all you would need to do is assign a typed letter to an on-screen position.
As the URP Slider also has 2x TTL Trigger In inputs you could also use it to mark or synchronize with other equipment.
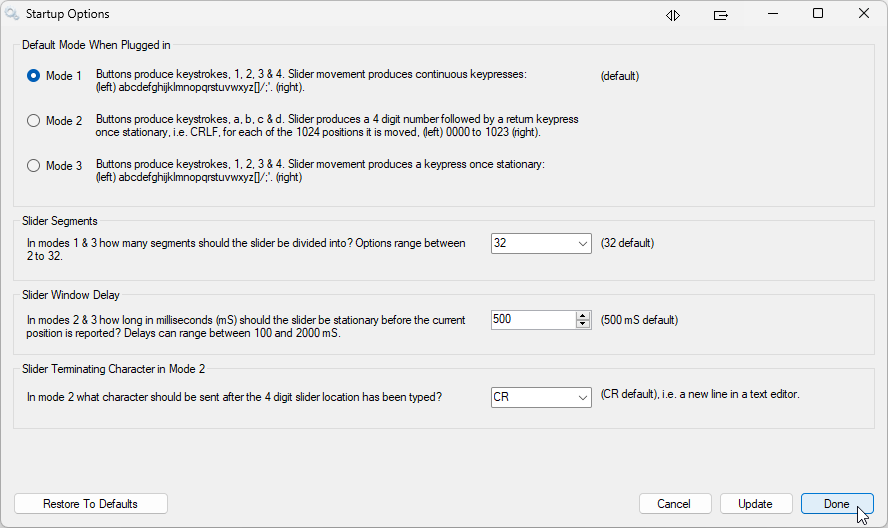
Finally you also have the choice of three modes when running the URP Slider as shown below. This enables you to choose how you want the slider position reported to your experiment and how fine grain you want the slider position to be.